
Creating a Clock with ImGui
Written by J$K
local function ImGuiExample()
	-- Begin our ImGui window
	ImGui.Begin("Clock", ImGuiWindowFlags.NoTitleBar | ImGuiWindowFlags.NoResize)
	-- Add text to our window.
	ImGui.Text("J$K is boss.")
	-- End our window.
	ImGui.End()
end

engine.addEventListener("render", ImGuiExample)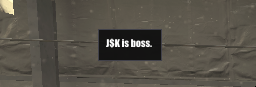


Last updated